 ultimate-guide
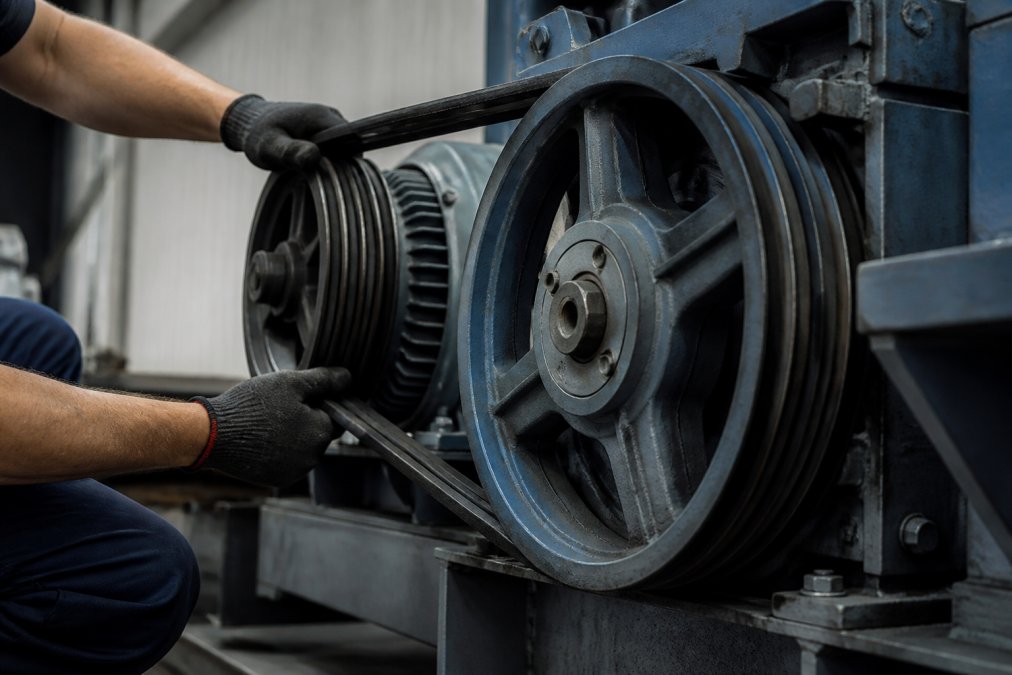
Replacing Industrial V-Belt Drive Systems: A 2026 Guide
Table of Contents
- When to Repair vs. Replace Your V-Belt Drive System
- Signs of Drive System Failure: What to Look For
- V-Belt vs. Synchronous Belt: Choosing the Right Conversion
- How to Fix V-Belt Slippage: Causes and Solutions
- Step-by-Step Replacement: From Lockout to Run-In
- V-Belt Tensioning Procedures for Maximum Lifespan
- Using Industrial Belt Drive Alignment Tools
- Environmental Factors and Noise Troubleshooting
- Frequently Asked Questions
Last Updated: September 6, 2026
Every maintenance manager eventually faces the same question: repair the existing v-belt drive systems or invest in a full replacement. The decision rarely comes down to belt condition alone, because downtime costs, energy consumption, and the age of the surrounding components all factor into the math. This guide from V-Belt Nation walks through the technical decision framework, installation procedures, and diagnostic steps that separate planned maintenance from emergency repairs.
The most common mistake is treating a squealing belt as a simple tension problem when the real issue is sheave wear or angular misalignment. Below, we'll show you exactly how to diagnose each failure mode and when a synchronous conversion makes financial sense.
When to Repair vs. Replace Your V-Belt Drive System
Deciding between a repair and a full replacement is a cost and risk calculation that weighs the current drive's condition against the operational cost of another failure.
Step 1: Quantify the Current Failure Cost
Before inspecting hardware, calculate the true cost of the recurring problem:
Total Failure Cost = (Replacement Parts + Labor) + (Downtime Hours × Cost of Lost Production per Hour)
For example, a 100 HP motor driving a critical fan at a continuous process plant can cost several thousand dollars per hour in lost production. If a V-belt failure shuts the line down for two hours, the downtime cost alone dwarfs the price of any belt or sheave.
Step 2: Assess the Mechanical Condition of the Drive
Repair is the correct choice when the failure is isolated to the belt itself and the supporting hardware is sound:
- Sheave grooves show a clean, uniform wear pattern with no significant step wear or polishing at the bottom of the groove.
- Shafts and keyways are free of visible wear, fretting, or bending.
- Bearings run without excessive heat, noise, or vibration.
- Drive alignment is within the manufacturer's tolerance, typically within 0.5 degrees for angular misalignment and 0.010 inches for parallel offset on standard industrial drives.
Replacement of the entire drive system is warranted when any of the following conditions are present:
- Sheave groove wear exceeds 1/32 inch below the original diameter, which prevents the belt from achieving proper wedge contact.
- The drive has been re-bored or bushed multiple times, compromising the hub-to-rim concentricity.
- The driven shaft or bearing housing shows fretting corrosion, indicating a fundamental alignment or loading problem that a new belt will not solve.
- The motor or driven unit is being replaced, making a conversion to a more efficient drive type cost-effective while the system is already disassembled.
Step 3: Apply the 10% Rule for Conversion Payback
A practical benchmark used by many plant engineers is that a synchronous conversion is worth pursuing if the projected energy savings exceed 10% of the drive's annual operating cost.
A standard V-belt drive typically operates at 93-95% efficiency under proper tension (energy.gov). A synchronous belt drive operates at 97-98% efficiency. The difference is small per drive, but it compounds on high-horsepower, continuously running equipment.
The calculation for annual energy savings is:
Annual Savings = (Motor HP × 0.746 kW/HP) × Operating Hours × Load Factor × Efficiency Gain × Electricity Rate ($/kWh)
For a 50 HP motor running 6,000 hours per year at 75% load with a 3% efficiency gain and an electricity rate of $0.12/kWh, the annual savings would be approximately $600. If the conversion costs $2,500 in parts and labor, the payback period is just over four years. If the same drive fails twice per year, the avoided downtime and replacement labor costs shorten that payback to under two years.
Step 4: Consider the Operational Context
The final factor is the drive's role in the production process. A non-critical drive on an intermittent application can tolerate a repair-and-monitor approach. A drive that is single-point-of-failure for a production line, a quality-critical process, or a safety system demands a more conservative strategy, where replacing the entire drive system at the first sign of systemic wear is often the lower-risk decision.
Signs of Drive System Failure: What to Look For
Drive system failures rarely happen without warning, but the warning signs are often misread because they overlap. Learning to distinguish between failure modes by their specific acoustic and visual signatures directs the technician to the correct root cause and prevents unnecessary parts replacement.
Acoustic Diagnostics: What Each Noise Pattern Means
The most immediate diagnostic tool is sound. Each failure mode produces a distinct acoustic signature:
Squeal During Startup or Load Application
A high-pitched squeal that occurs only during startup or when load is applied indicates belt slip. This is the belt losing its wedge grip in the sheave groove. The most common cause is undertensioning, but it can also result from:
- Glazed belt sidewalls, the friction surface has become hard and polished, reducing the coefficient of friction.
- Oil contamination on the belt or sheave surfaces.
- Sheave groove wear that has allowed the belt to ride on the bottom of the groove rather than the sidewalls.
Rhythmic Slap or Thump
A repetitive slapping sound that matches the rotational speed of the drive indicates a non-uniform condition. This is often caused by:
- A mismatched belt length in a multi-belt drive, causing one belt to alternately load and unload.
- A damaged or bent sheave that presents a high spot, causing the belt to lift and slap as it rotates.
- A belt with a hard spot or damaged section from improper installation or foreign object damage.
Constant Whine or Hum
A continuous whine that does not change with load is rarely a belt issue. This points to a bearing problem in the motor, gearbox, or driven unit. The belt is simply transmitting the vibration. Replacing the belt will not solve this issue.
Intermittent Chirp or Click
A chirp that occurs at regular intervals, often once per revolution, indicates a localized defect. This could be a single damaged tooth on a synchronous belt, a foreign object embedded in the belt, or a sheave with a damaged groove.
Visual Inspection: Reading the Belt and Sheave
Visual inspection of a failed belt provides a forensic record of the drive's condition. The wear pattern tells the story:
- Polished, shiny sidewalls indicate slip. The belt has been sliding in the groove rather than gripping.
- Cracking on the underside (compression section) indicates the belt has been running on too small a sheave diameter or has been exposed to excessive heat.
- Frayed edges or fabric exposure indicate misalignment, causing the belt to rub against the sheave flanges.
- Hardened, glazed surface indicates age or heat exposure, reducing the belt's flexibility and grip.
Sheave inspection is equally critical. The groove profile determines how the belt seats. Use a groove gauge or a simple visual check:
- A polished, concave groove bottom means the belt has been riding too low, indicating groove wear.
- Uneven wear on one side of the groove indicates angular misalignment.
- A stepped or ridged groove wall indicates the belt has been slipping and has worn a ledge into the sidewall.
Vibration and Temperature as Early Indicators
Vibration analysis is the most reliable early warning system for drive problems, but most facilities do not have analyzers on every drive. A simpler proxy is temperature. An infrared thermometer reading on the sheave or bearing housing after the drive has reached operating temperature provides a quick health check:
- A sheave that is more than 20°F above the ambient temperature indicates excessive friction from belt slip or misalignment.
- A bearing housing that is more than 40°F above ambient indicates a bearing problem that will eventually take the drive down.
The 10-Minute Drive Inspection Routine
A structured inspection routine catches most developing failures before they become catastrophic. The following sequence takes approximately 10 minutes per drive and should be performed at every scheduled maintenance interval:
- Listen for any unusual noise during startup and at full operating speed. Note the specific sound pattern.
- Observe the belt run for one full revolution. Look for flutter, slap, or uneven movement.
- Feel the belt for heat at the end of the run. A belt that is hot to the touch is slipping.
- Inspect the belt sidewalls for glazing or polish.
- Check the sheave grooves for wear, especially at the bottom of the groove.
- Verify alignment using a straightedge or laser tool.
- Record the findings in the maintenance log to establish a trend line for the drive's condition.
V-Belt vs. Synchronous Belt: Choosing the Right Conversion
Synchronous belts offer higher mechanical efficiency than friction drive V-belts because they eliminate slip through positive tooth engagement. This translates to reduced energy consumption and consistent drive ratio under varying loads.
However, the conversion is not a simple belt swap. Synchronous drives require different pulleys, precise shaft alignment, and significantly higher installation tension, offering less forgiveness for misalignment than a V-belt setup.
When a Synchronous Conversion Makes Sense
Conversion to synchronous belts makes financial sense when the drive operates continuously at high load, when precise speed control is critical to product quality, or when belt replacement downtime is driving production losses. Facilities running conveyors, machining centers, and other constant-speed applications see the strongest return.
For intermittent duty cycles, variable loads, or drives with significant shaft deflection, a cogged V-belt often delivers most of the efficiency gains without the alignment sensitivity of synchronous systems.
| Drive Type | Best Application | Key Limitation | Typical Payback Driver |
|---|---|---|---|
| Standard V-belt | General purpose, moderate loads | Slip under shock loads | Low replacement cost |
| Cogged V-belt | Higher loads, smaller sheaves | Higher cost per belt | Energy savings |
| Synchronous belt | Constant speed, precision drives | Requires alignment precision | Reduced downtime |
How to Fix V-Belt Slippage: Causes and Solutions
V-belt slippage occurs when the belt cannot transmit the required torque through friction alone. The first step to fix v-belt slippage is verifying that the installation tension meets the manufacturer's specification, since most slip problems trace back to undertensioned belts.
If tension is correct and slippage persists, inspect the sheave grooves for wear and check for angular misalignment between the driver and driven shafts. A belt that rides on the bottom of the groove rather than the sidewalls cannot develop adequate wedge force, regardless of tension.
Step-by-Step Replacement: From Lockout to Run-In
Replacing industrial v-belt drive systems requires methodical execution from the first step to the final run-in. The entire procedure, including tensioning and alignment verification, typically takes 45 to 90 minutes for a single drive.
Step 1: Safety First with Lockout/Tagout (LOTO)
Lockout/tagout (LOTO) is the non-negotiable first step before any physical work begins. The OSHA standard for control of hazardous energy requires that all energy sources be isolated, locked, and tagged before maintenance personnel access the drive. This includes electrical disconnection, verification of zero energy state, and blocking any gravity-driven components.
Step 2: Removing the Old Belt and Cleaning Components
Release the tensioner and slip the old belt off the sheaves without prying or forcing it. Inspect the old belt for patterns that indicate the root cause of failure, then clean the sheave grooves with a wire brush or solvent to remove debris, oil, and old belt residue. Check the grooves for wear and measure the shaft for runout while the drive is accessible.
Step 3: Installing the New Belt
Install the new belt without rolling or twisting it over the sheaves. Move the tensioner into position and bring the belt to initial tension, then rotate the drive several revolutions by hand to seat the belt properly in the grooves before applying final tension.
V-Belt Tensioning Procedures for Maximum Lifespan
V-belt tensioning procedures start with the deflection method, the most reliable field technique for standard drives. Apply a force perpendicular to the belt span at its midpoint and measure the deflection distance, then compare it to the manufacturer's specification.
Proper tension is achieved when the belt deflects approximately 1/64 inch per inch of span length under moderate thumb pressure. The belt should feel firm but show slight give, and it should not squeal during startup or run hot during operation.
New belts require a re-tensioning check after the first 24 to 48 hours of operation, as initial stretch is normal. This break-in period is when most premature failures occur, because operators forget to recheck tension after the belt seats.
Using Industrial Belt Drive Alignment Tools
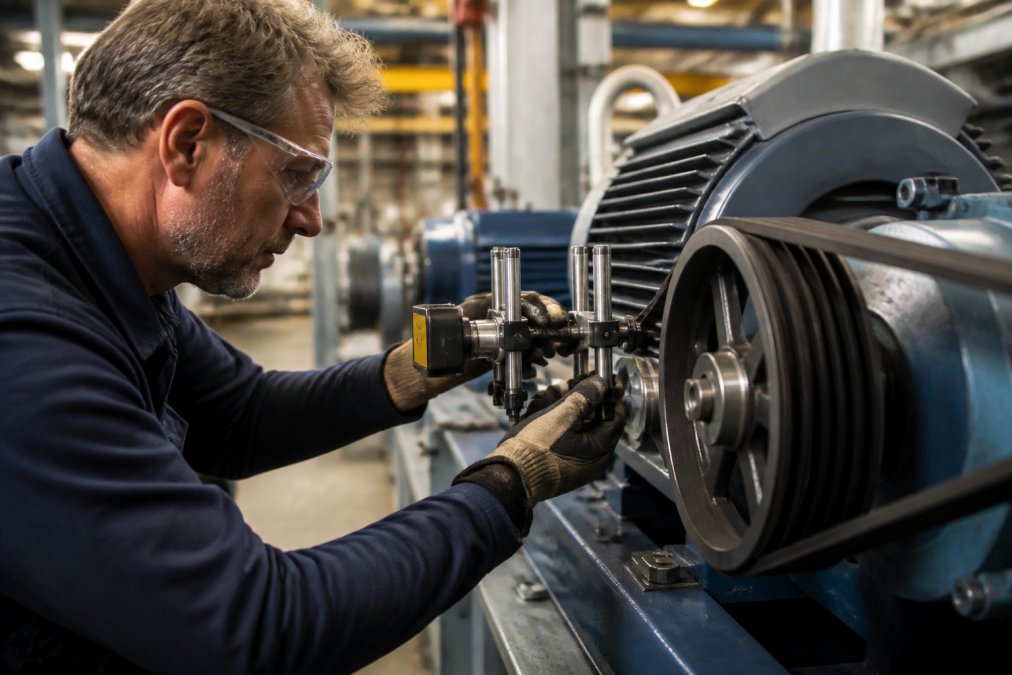
Industrial belt drive alignment tools range from straightedge methods to laser alignment systems. A straightedge across the sheave faces catches gross parallel misalignment, but laser tools detect angular misalignment that straightedges miss.
Proper alignment means the sheave faces are parallel and coplanar within tight tolerances. Misalignment accelerates belt wear, increases energy consumption, and generates noise. Facilities running multiple drives benefit from investing in laser alignment tools.
The American National Standards Institute's mechanical power transmission standards provide the alignment tolerance specifications used across industrial applications, and maintenance teams should reference these standards when establishing acceptance criteria.
Environmental Factors and Noise Troubleshooting
Environmental compatibility is a factor that many replacement decisions overlook. Heat, ozone, oil, and chemical exposure degrade belt compounds differently, and selecting the wrong material for the environment guarantees premature failure.
Noise troubleshooting follows a logical sequence. A squeal during startup indicates slip, a rhythmic slap indicates a mismatched belt length or a damaged sheave, and a constant whine often points to bearing issues rather than belt problems.
Static electricity buildup is another consideration in dust-prone environments. Conductive belts are available for applications where static discharge creates a safety hazard, and these should be specified during the replacement process rather than after an incident occurs.
Replacing industrial v-belt drive systems demands more than swapping a worn belt for a new one. Proper diagnosis, alignment verification, and tensioning procedures determine whether the new installation lasts months or years. V-Belt Nation supports maintenance teams with an extensive inventory of classic, wedge, cogged, and banded belts, plus personalized support to identify the correct cross-section and pitch length for any drive. Shop Now and keep your machinery running on schedule.
Frequently Asked Questions
How often should industrial V-belts be replaced?
There is no universal timeline. Replacement frequency depends on operating hours, load, and environmental conditions. A common baseline is every 1,500 to 3,000 operating hours, but this varies widely. The most reliable method is a preventative maintenance schedule that includes regular inspection for belt fatigue, cracking, and glazing. Measure belt stretch and check for sheave wear to catch issues early. If you notice signs of drive system failure like slippage or unusual noise, replace the belt promptly, regardless of the schedule.
What are the critical steps for tensioning a new V-belt?
Proper tension is critical for power transmission and belt lifespan. First, ensure the belt is seated correctly in the sheave grooves. Use a tension gauge to measure deflection, as feel-based methods are unreliable. For a standard V-belt, the general rule is to tension until the belt deflects about 1/64 inch per inch of span length with moderate thumb pressure. New belts stretch, so check tension after 30 minutes of run-in and again after 24 hours. Follow the V-belt tensioning procedures specified by the drive manufacturer for exact values.
Can I replace a standard V-belt with a cogged or synchronous belt?
Yes, but the approach differs. Cogged belts are a direct replacement for standard V-belts on the same pulleys and offer better flexibility and heat dissipation. A synchronous belt conversion, however, requires changing both pulleys to toothed versions. This is a larger project. Synchronous belts eliminate slippage, improving mechanical efficiency and reducing energy consumption. Before converting, verify your shafts are parallel and consider the load capacity and service factor to ensure the new drive system can handle the torque transmission requirements.
How do you ensure proper alignment when replacing V-belt drives?
Misalignment is a leading cause of premature belt failure. Use industrial belt drive alignment tools, such as a laser alignment system, to check both angular and parallel misalignment. A straightedge can work for short center distances, but lasers are more accurate. Check the sheaves for wobble and ensure the shafts are parallel. Proper alignment prevents uneven sheave wear, reduces belt fatigue, and minimizes noise. Correcting misalignment is a core part of any V-belt tensioning procedure and replacement job.
What safety precautions are necessary when replacing industrial drive belts?
The most critical step is following lockout/tagout (LOTO) protocols. De-energize the equipment and lock out the power source to prevent accidental startup. Wait for all moving parts to come to a complete stop before approaching the drive. Wear appropriate personal protective equipment, including safety glasses and gloves. Be cautious of stored energy, such as spring-loaded tensioners. Never reach into a rotating machine. Proper LOTO procedures protect you from serious injury during any maintenance task.
What is the lifespan of a belt drive system?
The lifespan of the individual belts depends on load, speed, and environmental factors like temperature and exposure to chemicals. A well-maintained V-belt drive, with correct tension and alignment, can last several years. However, the drive system itself, including sheaves, should be inspected for wear. Worn sheave grooves can damage new belts quickly. If you are replacing belts frequently, the issue is often not the belt quality but a deeper problem like pulley misalignment or an incorrect drive ratio, which requires a system review.