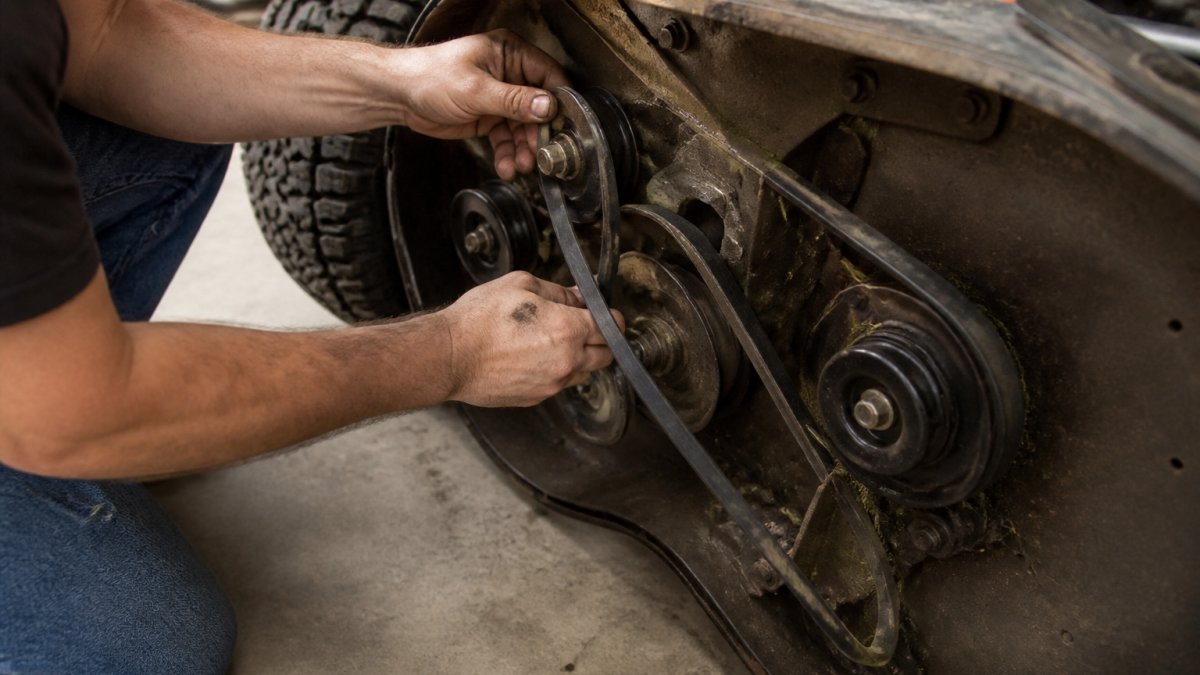
 how-to
How to Tension a New Mower Deck Belt
Table of Contents
- Understanding Your Mower Deck Belt System
- How Tight Should a Mower Deck Belt Be
- Step-by-Step: Mower Deck Belt Tension Adjustment
- Mower Deck Belt Routing Diagram Essentials
- New Mower Deck Belt Keeps Slipping: Diagnosis and Fix
- Common Mistakes to Avoid
- Frequently Asked Questions
Last Updated: October 6, 2026
Understanding Your Mower Deck Belt System
A mower deck belt is the rubber drive component that transfers power from your engine to the mower blades, and learning how to tension a new mower deck belt is essential for proper maintenance. Getting the tension right keeps your blades spinning smoothly and prevents slippage that stops your mower cold.
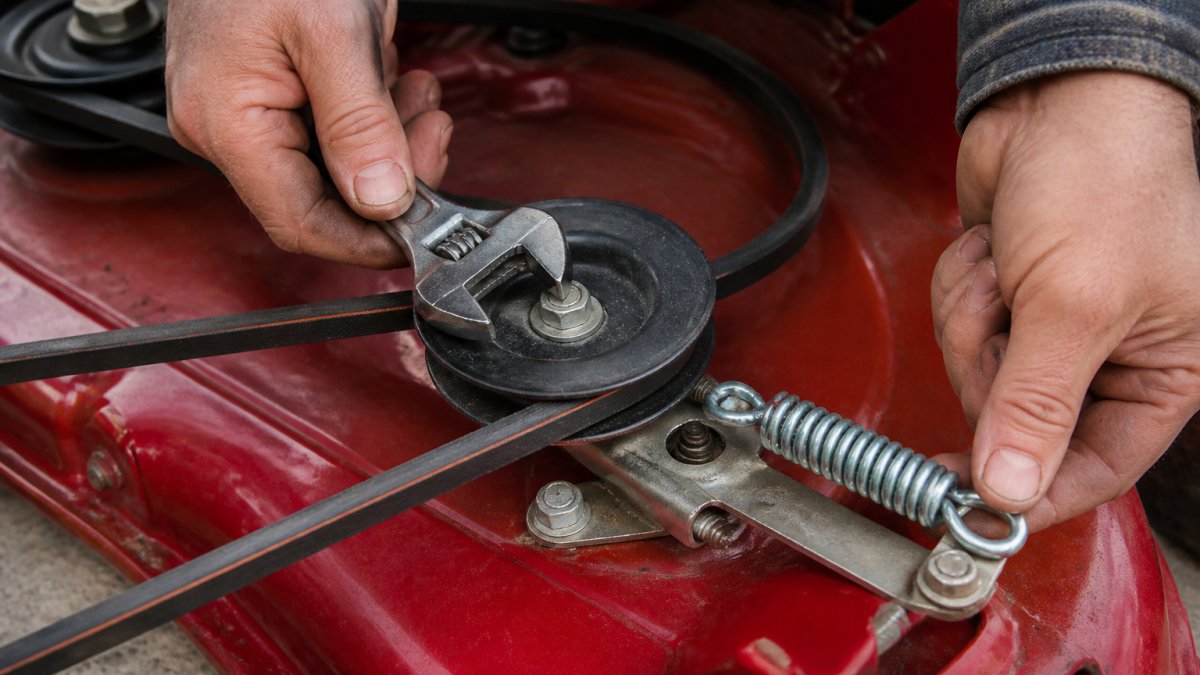
The belt system isn't just one part, it's a network of components working together. Understanding each piece makes tensioning much easier.
Components You Need to Know
Your mower deck belt system has several key parts:
- The belt itself: A rubber loop with grooves that grip the pulleys
- The idler pulley: A wheel that guides the belt and keeps it tight
- The tension spring: A coiled metal spring that pulls the idler arm, creating tension
- The eyebolt: A bolt with a loop end that anchors the spring
- The engagement lever or cable: The control you pull to engage the deck
- The adjustment nut: A fastener that lets you change spring length
Each part plays a role. The spring does most of the work, it holds constant pressure on the idler pulley. When you adjust the spring, you change how hard it pulls. That changes belt tension.
Spring-Loaded vs. Manual Adjustment Systems
Most residential mowers use spring-loaded systems. The spring automatically keeps pressure on the belt. You adjust tension by making the spring longer or shorter.
Some commercial or older mowers use manual tensioners. You turn an adjustment bolt by hand to move the idler.
Know which system you have before you start. Check your owner's manual for the specific mechanism. The adjustment method depends entirely on your design.
How Tight Should a Mower Deck Belt Be
Belt tension is measured by how far the belt moves when you press it midway between two pulleys. This is called deflection. Getting this right prevents both slipping and premature wear.
The Deflection Test
The deflection test is simple and tells you if your belt is too loose or too tight.
How to do it:
- Stop the mower and disconnect the spark plug wires (safety first)
- Find the longest span of belt between two pulleys
- Press the belt firmly with your thumb at the midpoint
- Measure how far it moves
Most mower belts should deflect between half an inch and three-quarters of an inch. Some move up to one inch.
If the belt barely moves, it's too tight. Tight belts wear fast and can snap. If it moves more than an inch, it's too loose and will slip.
Press with consistent force each time you test. Use the same finger and the same pressure. This keeps your measurements reliable.
Finding Your Mower's Specifications
Your owner's manual has the exact deflection target for your model. This is crucial information, different mowers have different requirements.
Where to find it:
- Check the manual's maintenance section
- Look for "belt tension" or "belt deflection"
- Some manuals show a diagram with measurements
- Write down the spec and keep it with your tools
If you've lost the manual, search online using your mower's model number. Most manufacturers post PDFs free.
Don't guess on tension. A half-inch difference can mean the belt slips or breaks early. Follow your manual's spec exactly.
Step-by-Step: Mower Deck Belt Tension Adjustment
Learning how to tension a new mower deck belt takes about 30 minutes once you understand the process. The key is doing it safely and methodically.
Step 1: Prepare and Release Spring Tension
Before you touch anything, make the mower safe.
What to do:
- Park the mower on flat ground
- Stop the engine and let it cool
- Disconnect both spark plug wires (prevents accidental starting)
- Engage the parking brake if your mower has one
- Locate the spring that holds tension on the idler pulley
Springs store energy. When you loosen them, that energy releases. Respect that force. If the spring suddenly snaps back, it can pinch your hand.
Slowly loosen the adjustment nut on the eyebolt. Turn it counterclockwise a quarter turn at a time. Watch the spring as it relaxes. Don't force it.
Once the spring is loose, you can remove the old belt and install the new one.
Step 2: Route the Belt Around Pulleys
This step is where most people make mistakes. The belt must follow the exact path shown in your manual.
The routing process:
- Check your manual's belt routing diagram
- Start at one pulley and trace the path
- Note which pulleys the belt wraps around
- Watch for any guides or guards that direct the belt
- Install the belt carefully, following the diagram exactly
The belt has grooves on the inside. These grooves must sit in the pulley grooves. If the belt is twisted or seated wrong, it will slip immediately.
Spin the pulleys by hand once the belt is on. The belt should move smoothly without rubbing on any frame parts.
Take your time here. A belt routed wrong will fail no matter how tight you make it.
Step 3: Measure and Adjust Spring Length
Now comes the actual tensioning. You'll adjust the spring length to get the right deflection.
How to adjust:
- Locate the eyebolt at the end of the spring
- Turn the adjustment nut clockwise to shorten the spring (increase tension)
- Turn it counterclockwise to lengthen the spring (decrease tension)
- Make small adjustments, a quarter turn at a time
- After each adjustment, test the deflection
- Stop when you hit your manual's target
The spring length changes how hard it pulls. Shorter spring = more tension. Longer spring = less tension.
Write down how many turns you make. If the belt slips later, you'll know how much to tighten it.
Step 4: Verify Belt Alignment and Seating
Once the tension feels right, verify that the belt is sitting correctly in all the pulley grooves.
Verification steps:
- Spin each pulley by hand slowly
- Watch the belt as it moves around each pulley
- The belt should sit centered in each groove
- Look for any twisting or rubbing
- Check that the belt doesn't contact any frame parts
- Reconnect the spark plug wires
- Start the mower briefly and listen for squealing
If the belt squeals, it's either too loose or not seated right. Stop and recheck the routing. Squealing on a new belt usually means a routing error, not a tension error.
Let the mower run for 15 minutes. New belts need a break-in period. The rubber softens slightly and seats better.
Mower Deck Belt Routing Diagram Essentials
Your manual's belt routing diagram is your most important tool. Don't skip this section.
Reading Your Manual's Belt Path
A good routing diagram shows:
- Every pulley the belt touches
- The order in which the belt wraps around them
- Any guides or guards that direct the belt
- The direction the belt moves
- Which pulleys are engine-driven vs. free-spinning
Trace the path with your finger before you install the belt. Say out loud what you're seeing. This mental rehearsal prevents mistakes.
Some diagrams are confusing because they're drawn from different angles. If the diagram doesn't match your actual mower, look for an updated version online.
Common Routing Mistakes and How to Avoid Them
Most routing errors fall into a few categories. Watch for these:
Mistake 1: Wrapping the belt backwards The belt grooves face inward toward the pulleys. If your belt is twisted, the smooth side faces the pulleys. It will slip immediately. Check the groove direction before installing.
Mistake 2: Skipping a pulley The belt must touch every pulley shown in the diagram. Missing even one pulley changes the tension and routing. Count the pulleys before and after installation.
Mistake 3: Routing under a guide instead of over it Some mowers have metal guides that direct the belt. The belt must go on the correct side of these guides.
Mistake 4: Installing the belt upside down Some belts have a top and bottom. The grooved side goes toward the pulleys. The smooth side faces out.
New Mower Deck Belt Keeps Slipping: Diagnosis and Fix
A new belt that slips is frustrating. But it usually means something's wrong with installation, not the belt itself.
Distinguishing Installation Error from Belt Defect
First, figure out what's actually wrong. A slipping belt and a bad belt need different fixes.
Check for installation errors first:
- Verify the belt routing matches your manual exactly
- Test the deflection, it might be too loose
- Spin the pulleys and watch the belt seating
- Look for the belt contacting any frame parts
- Make sure the belt grooves are in the pulley grooves
Nine times out of ten, slipping is a routing or tension issue. Fix those before you assume the belt is bad.
Signs of a bad belt:
- Visible cracks or chunks missing from the rubber
- Glazed or shiny grooves (means the belt is old and hardened)
- Fraying edges on the belt sides
- A burnt rubber smell
- The belt is visibly shorter than a new one
If the belt looks good and the routing is correct, the belt is probably fine. Tighten it.
Tension Verification After Installation
After you've tensioned the belt, verify it stays tight while the mower runs.
Post-installation checks:
- Run the mower for 15 minutes at half throttle
- Stop and let it cool
- Test the deflection again
- The deflection should be the same as before you started
- If it's looser, tighten the spring a quarter turn
- Run it again and retest
New belts sometimes settle slightly. One quarter turn is usually enough. Don't over-tighten trying to compensate.
If the belt keeps loosening, the spring might be weak. That's rare with new belts, but it happens. Contact V-Belt Nation for a replacement spring if needed.
Common Mistakes to Avoid
Learning from other people's errors saves time and frustration.
Mistake 1: Skipping the manual Your manual has the exact specs for your mower.
Mistake 2: Over-tightening the spring A tight belt wears fast.
Mistake 3: Ignoring spring safety Springs store energy.
Mistake 4: Installing a belt while the engine is hot Hot engines burn.
Mistake 5: Not checking belt alignment A misaligned belt wears on one edge.
Mistake 6: Forgetting to disconnect the spark plugs A mower can start unexpectedly when you're working on it.
Tensioning a new mower deck belt is a skill every mower owner should have.
Frequently Asked Questions
How do you tension a new mower deck belt?
Release the spring tension using a pry bar or wrench to relieve stored energy. Route the new belt around all pulleys following your mower's diagram. Measure the spring length (hook-to-hook) and adjust the eyebolt and nut to achieve the correct tension specified in your manual. Verify belt alignment in the pulley grooves and check deflection with a light downward push. Allow the belt to seat for a few minutes of operation before final verification.
How tight should a mower deck belt be?
Belt tension varies by mower model and is found in your owner's manual. Most belts deflect between 0.5 and 1 inch when you apply light downward pressure to the belt's midpoint between two pulleys. Spring length specifications are typically given as hook-to-hook measurements. Over-tensioning causes premature wear and bearing damage; under-tensioning causes slipping. Consult your manual's specifications rather than guessing, as different engagement systems have different requirements.
Why does my new mower deck belt keep slipping?
A new belt that slips is usually under-tensioned or incorrectly routed. Verify the belt follows the path shown in your manual and sits fully in each pulley groove. Check that the spring length matches your manual's specification. Clean pulley grooves of rust or debris that prevent proper seating. If tension is correct and routing is right, the belt may be the wrong size or profile. Contact V-Belt Nation with your mower model to confirm you have the correct replacement belt.
What's the difference between spring-loaded and manual adjustment systems?
Spring-loaded systems use a tension spring and eyebolt to maintain automatic belt pressure as the belt stretches over time. Manual systems require you to manually adjust the idler arm position using bolts and spacers. Spring-loaded systems are more common on residential mowers and require measurement of spring length (hook-to-hook). Manual systems are typical on commercial or older equipment and involve moving the idler arm bracket. Your manual specifies which type your mower uses and the correct adjustment procedure for that system.