 how-to
7 Tools for Mower Belt Replacement That Save Time
Last Updated: October 24, 2026
Quick Summary
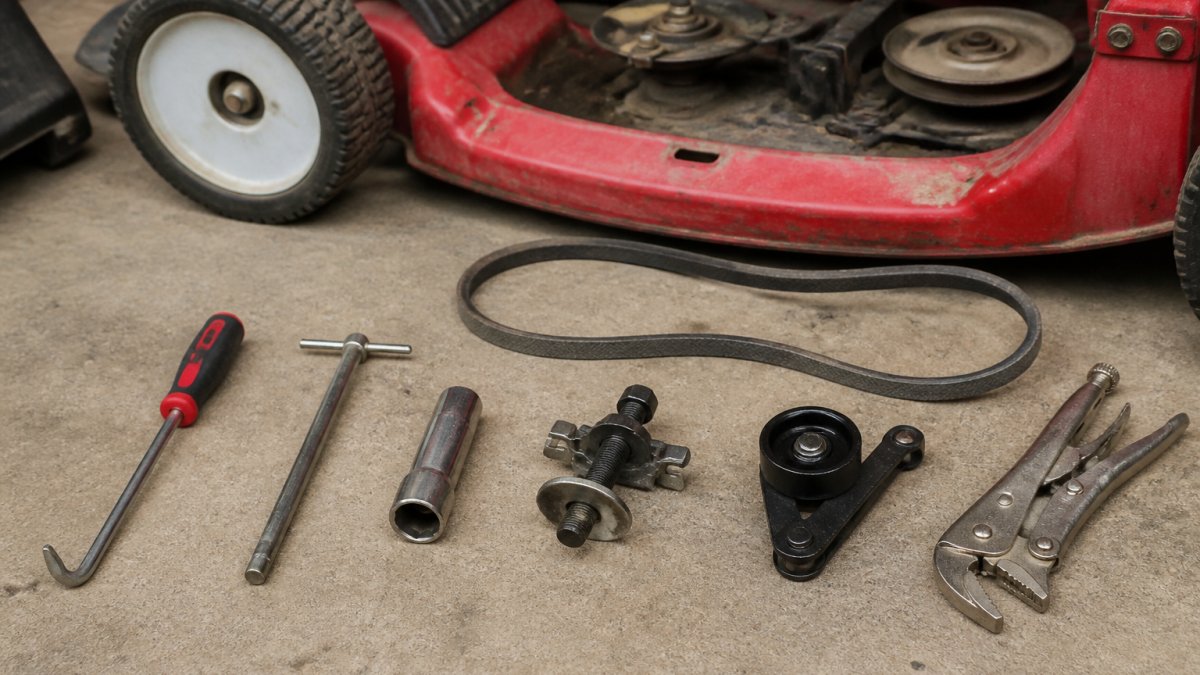
Mower belt replacement tools include a socket set and ratchet, adjustable wrench, screwdriver set, pliers, belt tension gauge, blade removal tool, and deck lift jack or support blocks. These seven essential tools ensure proper installation, correct tensioning, and safe access to the mower deck without mid-project hardware store trips.
- A quarter-inch drive socket set with metric and standard sockets covers deck bolts typically ranging from 8mm to 1/2 inch.
- A belt tension gauge removes guesswork by measuring tension in pounds of force against your mower's manual specifications.
- Never work under a mower supported only by a hydraulic floor jack; always use secondary support rated for the mower's weight.
- Disconnect the spark plug wire and remove the ignition key before beginning any belt replacement work.
- A worn belt stretches, so use the stamped belt code or model-and-serial-number parts lookup as the primary sizing source, not tape measurement alone.
Table of Contents
- Why the Right Tools Matter for Mower Belt Replacement
- How to Measure Lawn Mower Belt Size Before You Buy
- 7 Essential Tools for Mower Belt Replacement
- Lawn Mower Belt Removal Tool Options
- Using a Lawn Mower Belt Routing Diagram
- Lawn Mower Belt Size Chart and Compatibility Guide
- Safety Precautions and Preparation
- Finding Quality Replacement Belts and Tools
- Frequently Asked Questions
Why the Right Tools Matter for Mower Belt Replacement
Replacing a lawn mower belt without the right tools turns a simple job into a frustrating afternoon: you'll fumble with the wrong equipment, risk damaging components, and may end up with an improperly tensioned belt that slips or fails weeks later.
Many homeowners struggle because they improvise: a socket set that doesn't fit the bolt head, pliers that slip on the pulley, no way to check belt tension.
This guide covers the essential mower belt replacement tools, how to use them, and what to watch for during installation on a riding mower or push model.
How to Measure Lawn Mower Belt Size Before You Buy
Measuring your mower belt accurately prevents ordering the wrong replacement. Most belts are identified by length and width, and getting either wrong means the new belt won't fit.
Locate your mower's model number, usually stamped on the frame or deck, and write it down.
Many manufacturers print the belt size on the rubber. Look for a code like "A38" or "4L420" stamped along the surface; this designation tells you the belt profile and length.
Cross-reference your measurements and model number with your mower's manual or the manufacturer's parts diagram; if the manual is missing, search online using your exact model number, since most manufacturers offer free PDF downloads. For detailed guidance, measure your lawn mower belt using our step-by-step approach.
7 Essential Tools for Mower Belt Replacement
These seven tools cover nearly every mower belt replacement scenario, and having them on hand prevents mid-project trips to the hardware store.
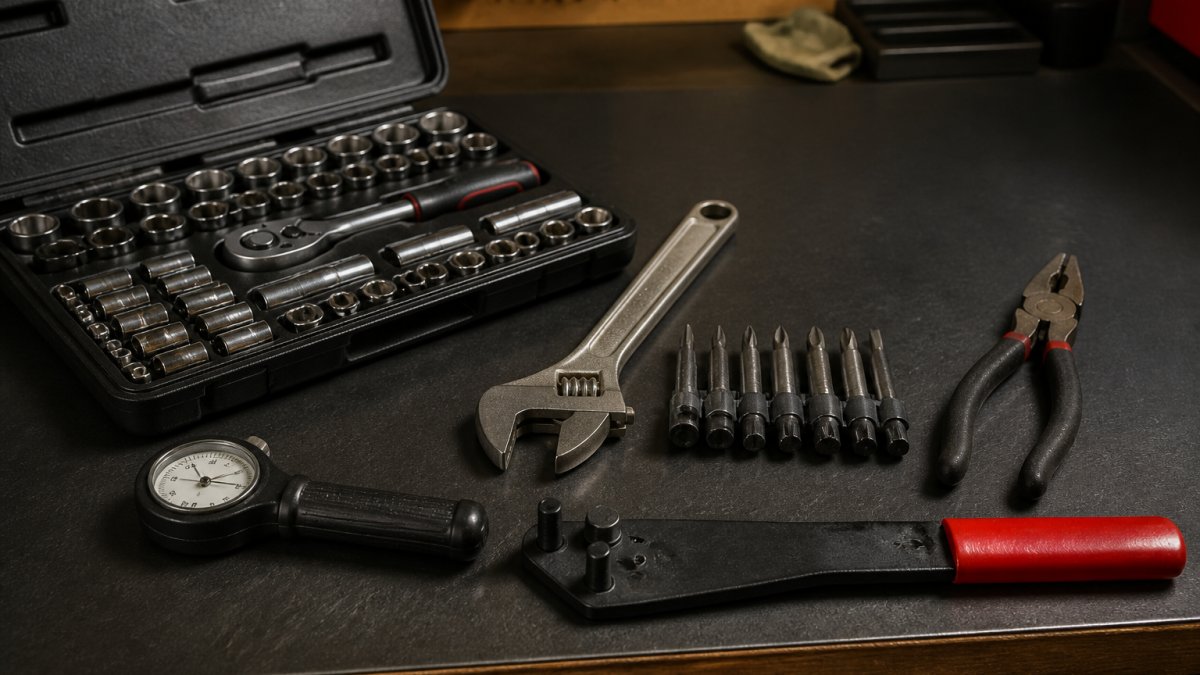
Socket Set and Ratchet
A socket set with a ratchet handle is the workhorse of mower maintenance.
Choose a set with both metric and standard sockets. A quarter-inch drive is ideal for mower work, and look for clear size markings and a ratchet that doesn't slip under pressure.
Forcing a socket onto a bolt head that's slightly too large can strip the bolt, making removal impossible without drilling. Verify the fit before applying full pressure.
Adjustable Wrench
An adjustable wrench handles bolts and fasteners that don't align with your socket set. A 10-inch adjustable wrench covers most mower belt replacement situations without dozens of individual wrenches.
Quality matters: cheap adjustable wrenches have loose jaws that slip under pressure. Invest in one with a tight, responsive adjustment mechanism that grips firmly.
Screwdriver Set
Most mower decks and covers are held with screws, not bolts, so you'll need Phillips head and flathead screwdrivers in various sizes. A multi-bit screwdriver reduces clutter, but individual drivers with comfortable handles are easier to control.
Mower screws often sit in tight spaces, so a set with both standard and stubby lengths helps. Magnetic tips prevent dropping screws into the deck or engine compartment.
Pliers
Pliers serve multiple purposes during belt replacement: needle-nose pliers remove retaining clips and adjust belt routing, slip-joint pliers handle general gripping, and locking pliers hold components steady while you work.
A three-piece set covering needle-nose, slip-joint, and locking styles covers 95% of mower maintenance tasks. Look for comfortable grips, since you'll be squeezing them repeatedly.
Belt Tension Gauge
Proper belt tension is critical: too loose and the belt slips and wears prematurely, too tight and you overload the pulleys and bearings. A belt tension gauge removes the guesswork.
Most gauges measure tension in pounds of force, and your mower's manual provides the target range. A mechanical gauge is durable and battery-free; digital versions offer precise readings but cost more.
Blade Removal Tool
Accessing the mower deck often requires removing the blades first. A dedicated blade removal tool holds the blade steady while you loosen the bolt, preventing it from spinning and damaging your hands.
The tool is inexpensive and saves frustration. For detailed instructions, learn how to change your riding mower belt step by step.
Deck Lift Jack or Support Blocks
Raising the mower deck safely is essential. A hydraulic deck lift jack designed for mowers provides stable support and smooth height adjustment; concrete blocks or sturdy jack stands work but are less stable.
Never work under a mower supported only by a hydraulic floor jack; always use secondary support rated for the mower's weight.
These seven tools cover nearly every mower belt replacement scenario and prevent mid-project trips to the hardware store.
| Tool | Primary Use | Key Specification |
|---|---|---|
| Socket Set and Ratchet | Remove deck bolts | Quarter-inch drive, metric and standard |
| Adjustable Wrench | Handle bolts outside socket set | 10-inch length |
| Screwdriver Set | Remove deck covers and screws | Phillips and flathead, stubby lengths |
| Pliers | Remove clips, adjust routing | Needle-nose, slip-joint, locking styles |
| Belt Tension Gauge | Check proper belt tension | Mechanical or digital, pounds of force |
| Blade Removal Tool | Hold blade steady during removal | Inexpensive, prevents hand injury |
| Deck Lift Jack or Support Blocks | Raise mower deck safely | Hydraulic jack or rated jack stands |
Lawn Mower Belt Removal Tool Options
Beyond the seven core tools, several specialized options simplify specific tasks. A belt removal tool with a pulley hook makes adjusting tension easier, and belt dressing spray improves grip temporarily, though it's a short-term fix, not a replacement for proper tension.
A torque wrench ensures bolts are tightened to the manufacturer's specifications, preventing loose fasteners and stripped bolt heads. For mower work, one rated for 10-100 foot-pounds covers the typical range.
A pulley alignment tool helps verify that pulleys are parallel before installing the new belt. Misaligned pulleys cause premature wear and slippage. Many shops have this tool, but serious DIY enthusiasts find it worth owning.
Using a Lawn Mower Belt Routing Diagram
The belt routing diagram is your roadmap for reassembly.
The diagram shows which pulleys the belt drives and the exact path it follows.
After installing the new belt, verify it follows the diagram precisely. The belt should sit centered on each pulley, not riding toward the edge.
For guidance on proper tensioning after installation, learn how to tension your new mower deck belt using the correct techniques.
Lawn Mower Belt Size Chart and Compatibility Guide
Belt sizing is where most DIY belt replacements go wrong, and the confusion usually starts with the code stamped on the old belt. Two naming systems dominate lawn and garden equipment, and they do not mean what most people assume.
How to read the two common belt codes
- 4L-series (fractional-horsepower V-belts). The "4L" denotes the belt profile: a 1/2-inch top width with a 5/16-inch thickness. The number after the letters is the outside length in inches. A 4L420 belt is 1/2 inch wide and 42 inches long outside. A 4L460 is 46 inches long. The number is not a width measurement and not a length in sixteenths of an inch.
- A-series (classical A-section V-belts). The "A" denotes a 1/2-inch top width with a 5/16-inch thickness, the same profile family as 4L but built to a different load standard. The number is the outside length in inches. An A38 belt is 1/2 inch wide and 38 inches long. An A42 is 42 inches long.
- B-series and 5L-series. Wider profiles (5/8-inch top width) used on larger decks and some commercial walk-behinds. The number is still the outside length in inches.
Compatibility by mower type
Belt requirements differ by drive layout, not just by deck width:
- Walk-behind push mowers. Usually a single short belt driving the blade from the engine shaft, often in the 3L or 4L range. Many are 1/2-inch wide and 30 to 40 inches long. Some self-propelled models add a second, smaller drive belt for the transmission.
- Riding mowers (lawn tractors). Typically two belts: a deck drive belt running from the engine PTO pulley down to the deck, and a ground-drive belt (or hydrostatic drive) in the chassis. Deck belts on 42- to 54-inch decks commonly fall in the 4L or A range with outside lengths from roughly 60 to 100 inches, but the exact length is model-specific and should never be guessed.
- Zero-turn mowers. Often use wider, heavier-duty belts (5L or B profile) on the deck, and some use a separate pump drive belt. Tension is frequently set by a spring-loaded idler rather than a manual adjustment, so the correct belt length is critical, a belt that is even an inch off can prevent the idler from reaching its operating range.
A practical compatibility checklist
- Locate the model and serial number plate (usually on the frame under the seat or on the deck housing) and write both numbers down.
- Look up the OEM part number in the parts diagram for your exact serial range, serial breaks are common and a belt that fits one year's model may not fit the next.
- Cross-reference the OEM number to an aftermarket belt using the belt maker's cross-reference tool, and confirm the profile (3L, 4L, 5L, A, B) and outside length match.
- If the old belt's code is legible, compare it to the cross-reference result. If they disagree, trust the parts diagram.
- Confirm the belt is the correct construction for your drive, cogged, double-sided, or wrapped, before ordering.
If you are still narrowing down the correct belt, our guide on how to measure a lawn mower belt walks through the tape-measure confirmation step in detail.
Safety Precautions and Preparation
Belt replacement involves three real hazards: accidental engine start, a deck that drops or shifts while you are under it, and stored spring tension releasing when you move an idler pulley. A short, ordered preparation routine addresses all three before you touch a bolt.
Step 1: Kill the ignition path
- Disconnect the spark plug wire (or wires, on twin-cylinder engines) and tuck the boot away from the plug so it cannot re-contact. On electric-start models, also disconnect the negative battery cable at the battery terminal.
- Remove the key from the ignition and, on models with a blade-engagement switch, confirm the PTO is disengaged.
- Do not rely on the key alone. A mower can be cranked by a second person or by a faulty switch, and the plug wire is the only certain interruption.
Step 2: Let it cool and stabilize
- Allow the engine and muffler to cool completely. Mufflers on air-cooled engines reach temperatures that cause contact burns, and belts routed near the muffler can be hot enough to burn through gloves.
- Park on a hard, level surface, not grass or gravel. Set the parking brake and chock the wheels you are not raising.
- If you must raise the front or deck, use a jack rated for the machine's weight and place rated jack stands or sturdy blocks under the frame before you go underneath. Never work under a machine held only by a hydraulic jack, a hose or seal failure drops it instantly.
Step 3: Release stored energy before removing the belt
- Most decks use a spring-loaded idler to tension the belt. Before you pull the belt off, identify the idler arm and note which direction it moves to relieve tension. Keep fingers clear of the pinch point between the idler pulley and the belt, this is the most common hand injury in belt work.
- If the deck has a manual tension adjuster (a threaded rod or slotted bracket), back it off gradually rather than removing the fastener under load.
- On decks with a spring assist, the spring can store enough force to snap the idler arm when the belt is removed. Control the arm with a wrench or a belt tool rather than letting it release freely.
Step 4: Protect yourself and the machine
- Wear gloves, the deck housing, blade edges, and pulley rims are sharp, and used belts can carry wire reinforcement that cuts.
- Wear eye protection when prying or when using a belt tool under spring tension.
- Inspect pulleys, idlers, and the deck shell before installing the new belt. A seized idler bearing, a chipped pulley groove, or a bent idler arm will destroy a new belt in short order, fix those first.
Once the new belt is on and the guards and plug wire are restored, start the engine and engage the blades briefly at low throttle to confirm the belt tracks correctly before mowing. For the tensioning and post-installation checks that follow, see our guide on preventing mower belt slippage.
Finding Quality Replacement Belts and Tools
Quality matters for both the replacement belt and the tools you use to install it. Learn what to look for when buying replacement belts to ensure durability and reliable performance.
V-Belt Nation carries a comprehensive selection of lawn and garden belts designed for durability and reliable performance. Our inventory includes classic and wedge belts.
When selecting tools, prioritize quality over quantity. A single well-made socket set outlasts three cheap alternatives. Durable construction, clear markings, and comfortable grips make tools easier and safer to use.
Frequently Asked Questions
How do you measure a lawn mower belt for replacement?
Measure the belt's outer circumference using a soft measuring tape while the mower is off and disconnected. Wrap the tape around the belt without stretching it, then note the measurement in inches. Check your mower's manual or the old belt for the size designation, which typically appears as a number like 4L or 5L. For accuracy, measure the belt's width and depth as well, since V-belts come in standard sizes. Most lawn mower belts range from 40 to 60 inches in circumference.
Can you replace a mower belt with basic hand tools?
Yes, basic hand tools are sufficient for most lawn mower belt replacements. You'll need a socket set, ratchet, adjustable wrench, and screwdrivers to remove the deck and access the belt. A belt tension gauge helps ensure proper tension after installation, but isn't essential for homeowners. The main requirement is patience and a clear understanding of your mower's belt routing. Always consult your mower's manual for model-specific instructions and safety requirements before starting work.
What tool helps remove a mower blade when replacing a belt?
A blade removal tool or blade holder stabilizes the blade while you loosen the center bolt, preventing the blade from spinning. Many homeowners use a wooden block or a specialized blade removal tool to hold the blade steady. Socket sets with the correct size socket and a ratchet wrench work well for loosening the fastener. Some mowers have a blade brake that locks the blade automatically. Having the right tool prevents injury and makes the job faster, though careful hand-holding with a rag also works if you're cautious.
Why does mower belt replacement require a belt routing diagram?
A belt routing diagram shows exactly how the belt wraps around the pulleys and idler on your specific mower model. Incorrect routing can cause the belt to slip, wear prematurely, or fail during operation. Most routing diagrams are printed on the mower deck or inside the operator's manual. If your diagram is missing or unclear, check the mower manufacturer's website or contact their support team. Taking a photo of the old belt's path before removal also serves as a reference during reinstallation.
The difference between a frustrating belt replacement and a smooth one comes down to preparation and the right equipment. Invest in the core tools now, and you'll have them for years of mower maintenance. When you're ready to order your replacement belt, V-Belt Nation's team can help you identify the exact size your mower needs and get it shipped quickly with free ground delivery on orders over $175.